Transferring Game Saves
This guide will explain how to transfer game saves between:
- a Wii/Wii U(vWii),
- Dolphin Emulator,
- GameCube memory cards,
- and (Nintendont) emulated memory cards.
What you need
- an SD card formatted to FAT32/MS-DOS
Instructions
- Insert your SD card into your Wii/Wii U.
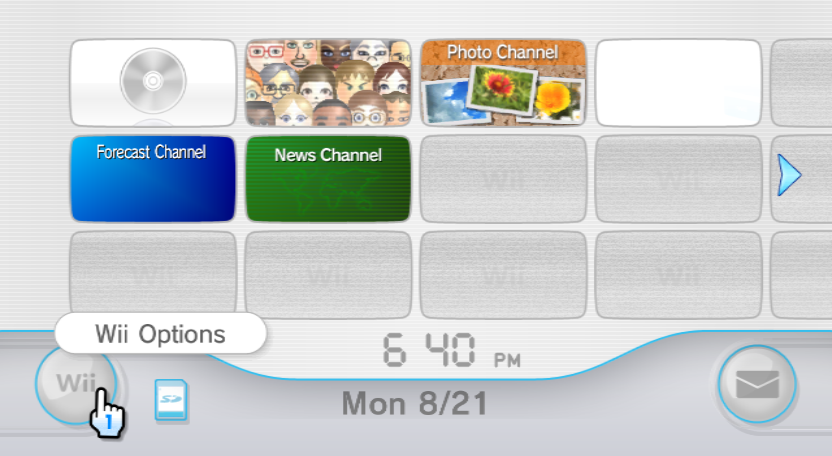
- In the Wii Menu, select the
Wii Optionsat the bottom left. - Select
Data Management(if on Wii),Save Data, thenWii. - Select a save you would like to transfer, then select
Copy.- If the
Copybutton is greyed out, you will need to install Priiloader to disable the copy protection.
- If the
- Repeat the previous step for each save you would like to transfer.
- Once you are finished, put the SD card into your other Wii/Wii U.
- In the Wii Menu, select the
Wii Optionsat the bottom left. - Select
Data Management(if on Wii),Save Data, thenWii. - Select the
SD Cardtab at the top right. - Select one of the saves you have copied to your SD card, then select
Copy. - Repeat the previous step for each save you have copied to your SD card.
Make sure you have installed cIOS before following this!
What you need
- The Homebrew Channel on both systems
- An SD card or USB drive
- SaveGame Manager GX
Instructions
- Extract SaveGame Manager GX to the root of your SD card or USB drive, and put it into your source Wii/Wii U.
- Launch the Homebrew Channel, then launch SaveGame Manager GX.
- Ensure that the source is set to Wii.
- Find and select your save, then
Extract, thenDefault.- Repeat this for the rest of the saves you would like to copy.
- Press the HOME button and exit SaveGame Manager GX.
- Put the SD card into the target Wii/Wii U.
- Create a new save file for each game. This is needed so that SaveGame Manager GX can overwrite it.
- Launch the Homebrew Channel, and launch SaveGame Manager GX.
- Ensure that the source is set to your SD or USB.
- Select each save you copied and click
Install.
By importing your NAND backup into Dolphin, you effectively copy everything on your Wii (at the time of the backup). This also has the benefit of allowing access to Wiimmfi, as well as carrying over RiiConnect24 patched channels.
If you have already done this, consider the SaveGame Manager GX method to save time.
What you need
- a NAND backup
- Latest beta version of Dolphin Emulator
Instructions
- After making your NAND backup, put your SD card into your PC and open Dolphin Emulator.
- Select
Tools > Manage NAND... > Import BootMii NAND Backup. - In the file dialog that opens, go to your SD card and select
nand.bin.
Make sure you have installed cIOS before following this!
What you need
- The Homebrew Channel on your Wii/vWii
- SaveGame Manager GX
- An SD card or USB drive
- Latest beta version of Dolphin Emulator
Instructions
- On your Wii/Wii U, launch the Homebrew Channel, then launch SaveGame Manager GX.
- Find and select the save you would like to transfer, select
Extract, then selectDefault.- Repeat this for all the saves you would like to transferred.
- Once you have extracted all your save files, press HOME and exit SaveGame Manager GX.
- Insert your SD card or USB drive into your PC.
- Open Dolphin Emulator.
- Select
Tools > Import Wii Save.... - In the file dialog that opens, go to the
savegamesfolder on your SD or USB, and select each.binfile inside it.
Unfortunately, you can only select one at a time, so you must repeat the last step for each .bin file.
All methods here assume you have the latest Beta or Development version of Dolphin Emulator.
What you need
- an SD card
Instructions
- Open Dolphin Emulator.
- If you exporting a select game’s save, right click the game inside the Dolphin window and select
Export Wii Save.- If you are exporting all your Wii saves from Dolphin, select
Tools > Export All Wii Saves.

- If you are exporting all your Wii saves from Dolphin, select
- In the folder dialog that pops up, select your SD card. (Don’t go inside any other folder!)
- Safely eject your SD card, then put it into your Wii/Wii U.
- If on a Wii U, be sure to launch Wii Mode.
- Select the
Wii Optionsbutton at the bottom left. - Select
Data Management(if on Wii),Save Data, thenWii. - Go to the
SD Cardtab at the top right. - Select each save that you would like to copy to your Wii/Wii U and select
Copy.
Make sure you have installed cIOS before following this!
What you need
- The Homebrew Channel on your Wii/vWii
- An SD card or USB drive
- SaveGame Manager GX
Instructions
- Open Dolphin Emulator.
- If you exporting a select game’s save, right click the game inside the Dolphin window and select
Export Wii Save.- If you are exporting all your Wii saves from Dolphin, select
Tools > Export All Wii Saves.
- If you are exporting all your Wii saves from Dolphin, select
- In the folder dialog that pops up, select your SD card/USB drive. (don’t go inside any other folder!)
- Safely eject your SD card/USB drive, then put it into your Wii/Wii U.
- If on a Wii U, be sure to launch Wii Mode.
- Launch the Homebrew Channel, then launch SaveGame Manager GX.
- Ensure that the source is set to your SD or USB.
- Select each save and click
Install.
What you need
- a Wii with GameCube ports and the Homebrew Channel installed
- An SD card or USB drive
- GCMM
Instructions
- Open Dolphin Emulator.
-
In the main menu, select
File > Open User Folder.
- In the folder that opens, navigate to
GC > [Save region] > Card A. - Copy the
.gcifiles you would like to put on your Memory Card. - Create a folder named
MCBACKUPon your SD card or USB drive, and place the.gcifiles you copied into it.
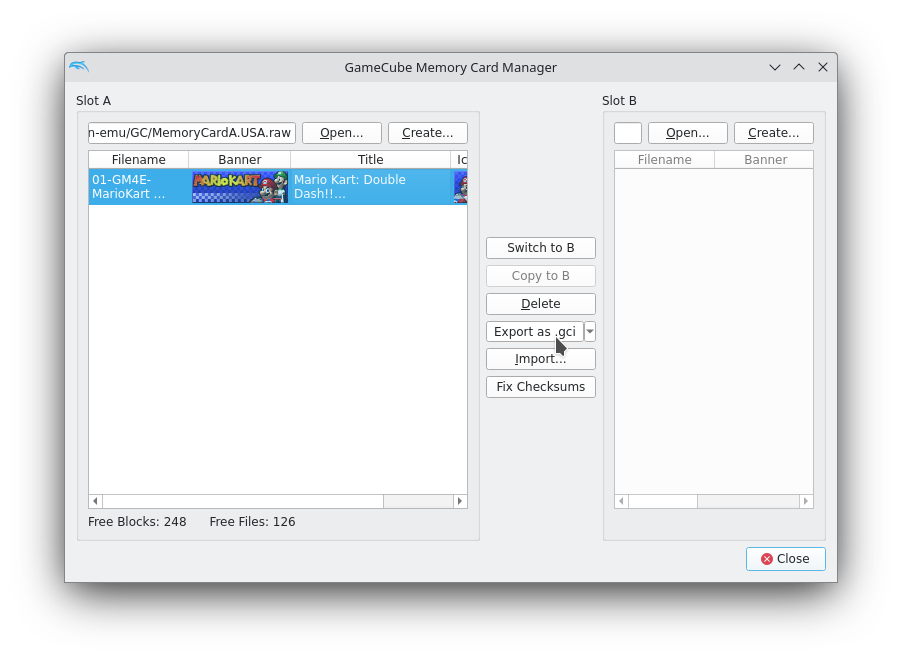
If Dolphin is set to use a .raw memory card, use Tools > Memory Card Manager to export your desired saves to .gci.
- Download and extract GCMM to the root of your SD card or USB drive.
- Safely eject the SD/USB from your PC, then insert it into your Wii.
- Launch the Homebrew Channel, then launch GCMM.
-
Select the device you have copied the
.gcifiles to.
-
Press
+/Xto enter Restore mode.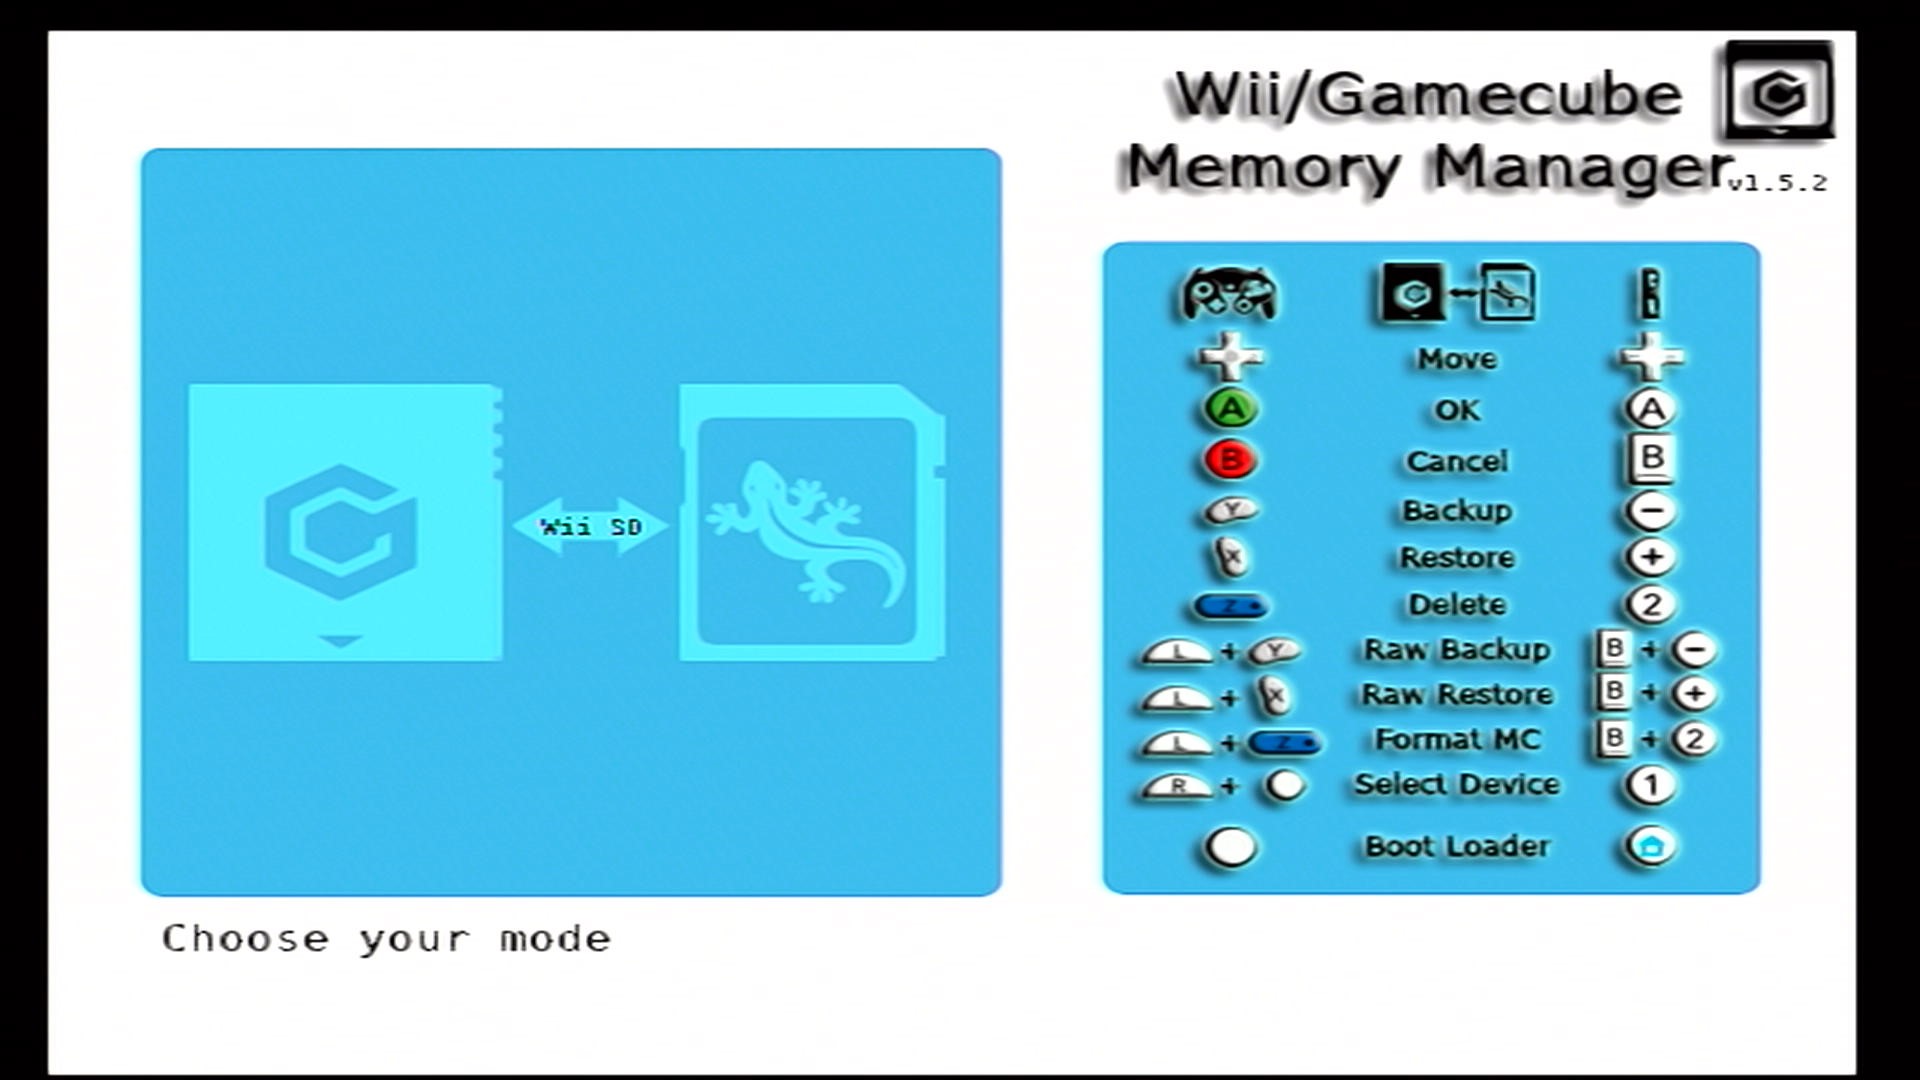
-
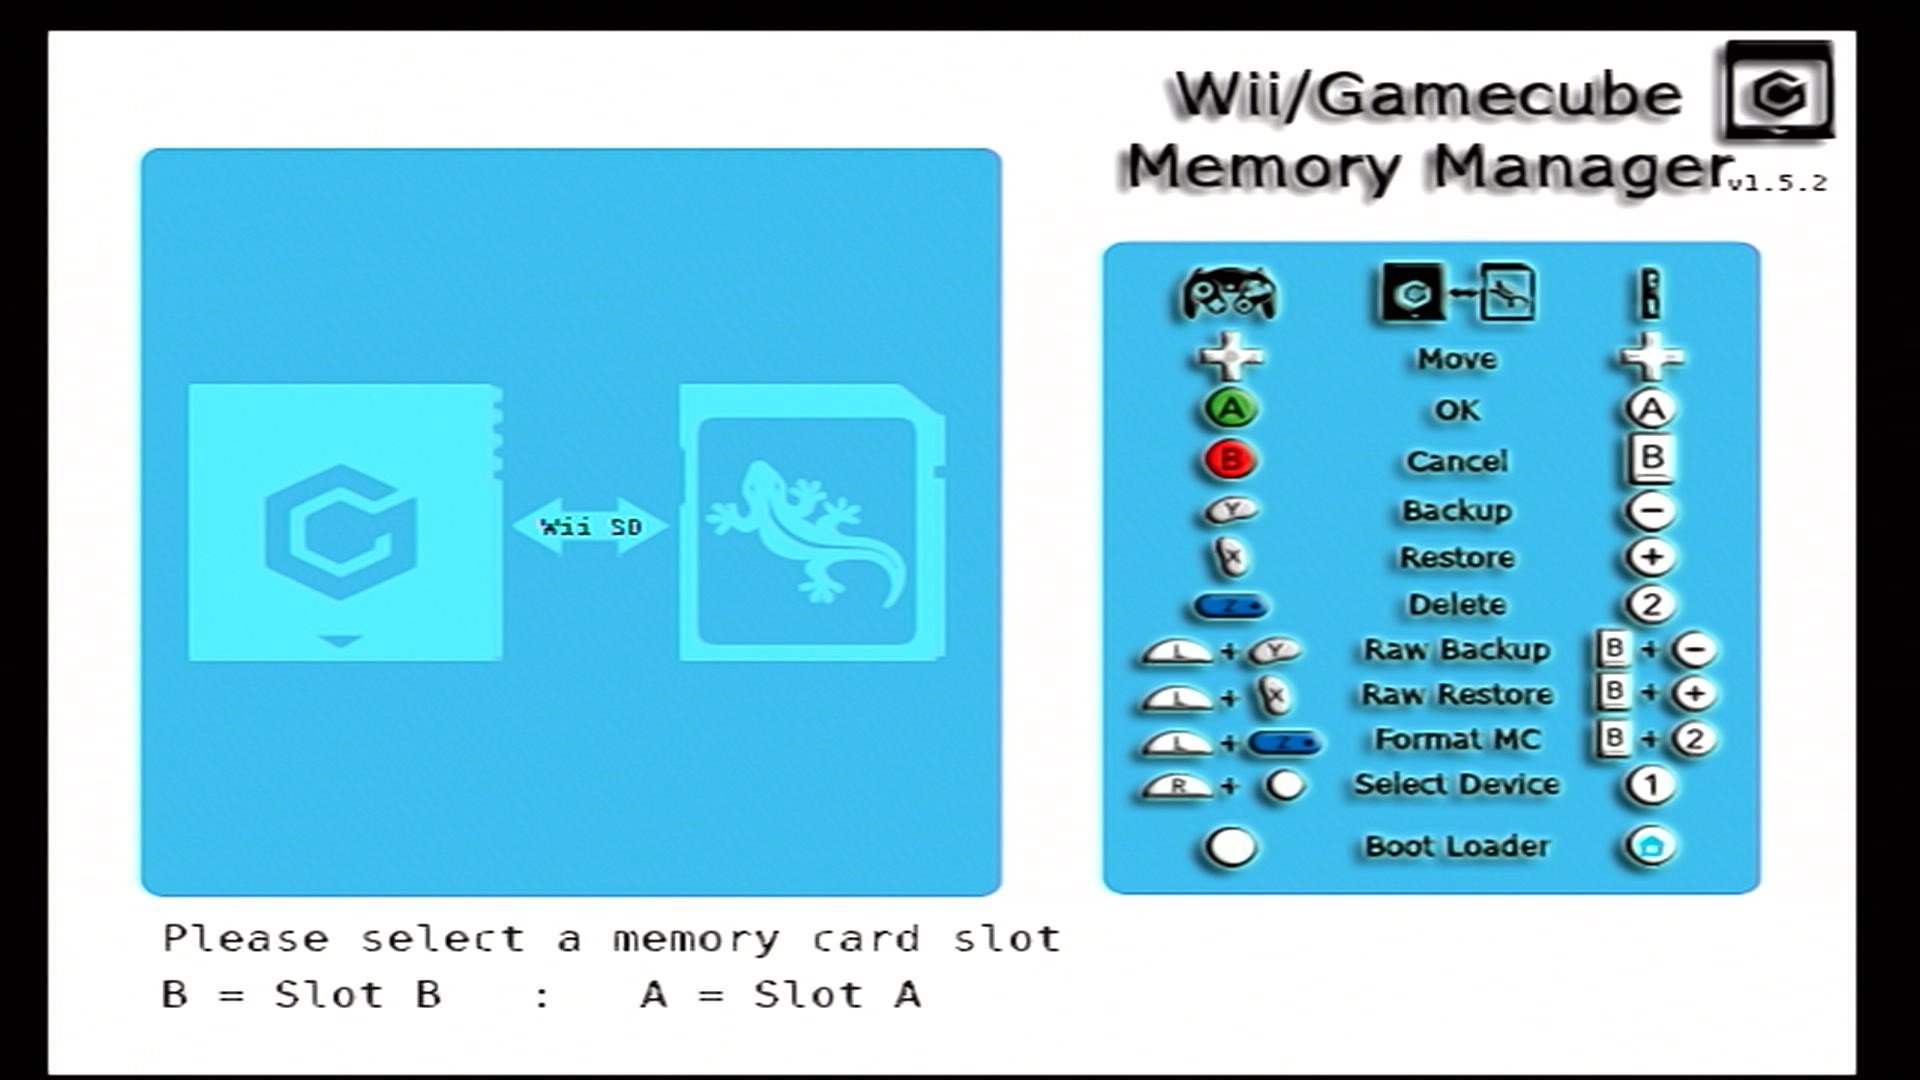
Select the slot that has your Memory card.
- Select the save you would like to restore.
- If you would like to restore all the saves in
MCBACKUP, press1/R.
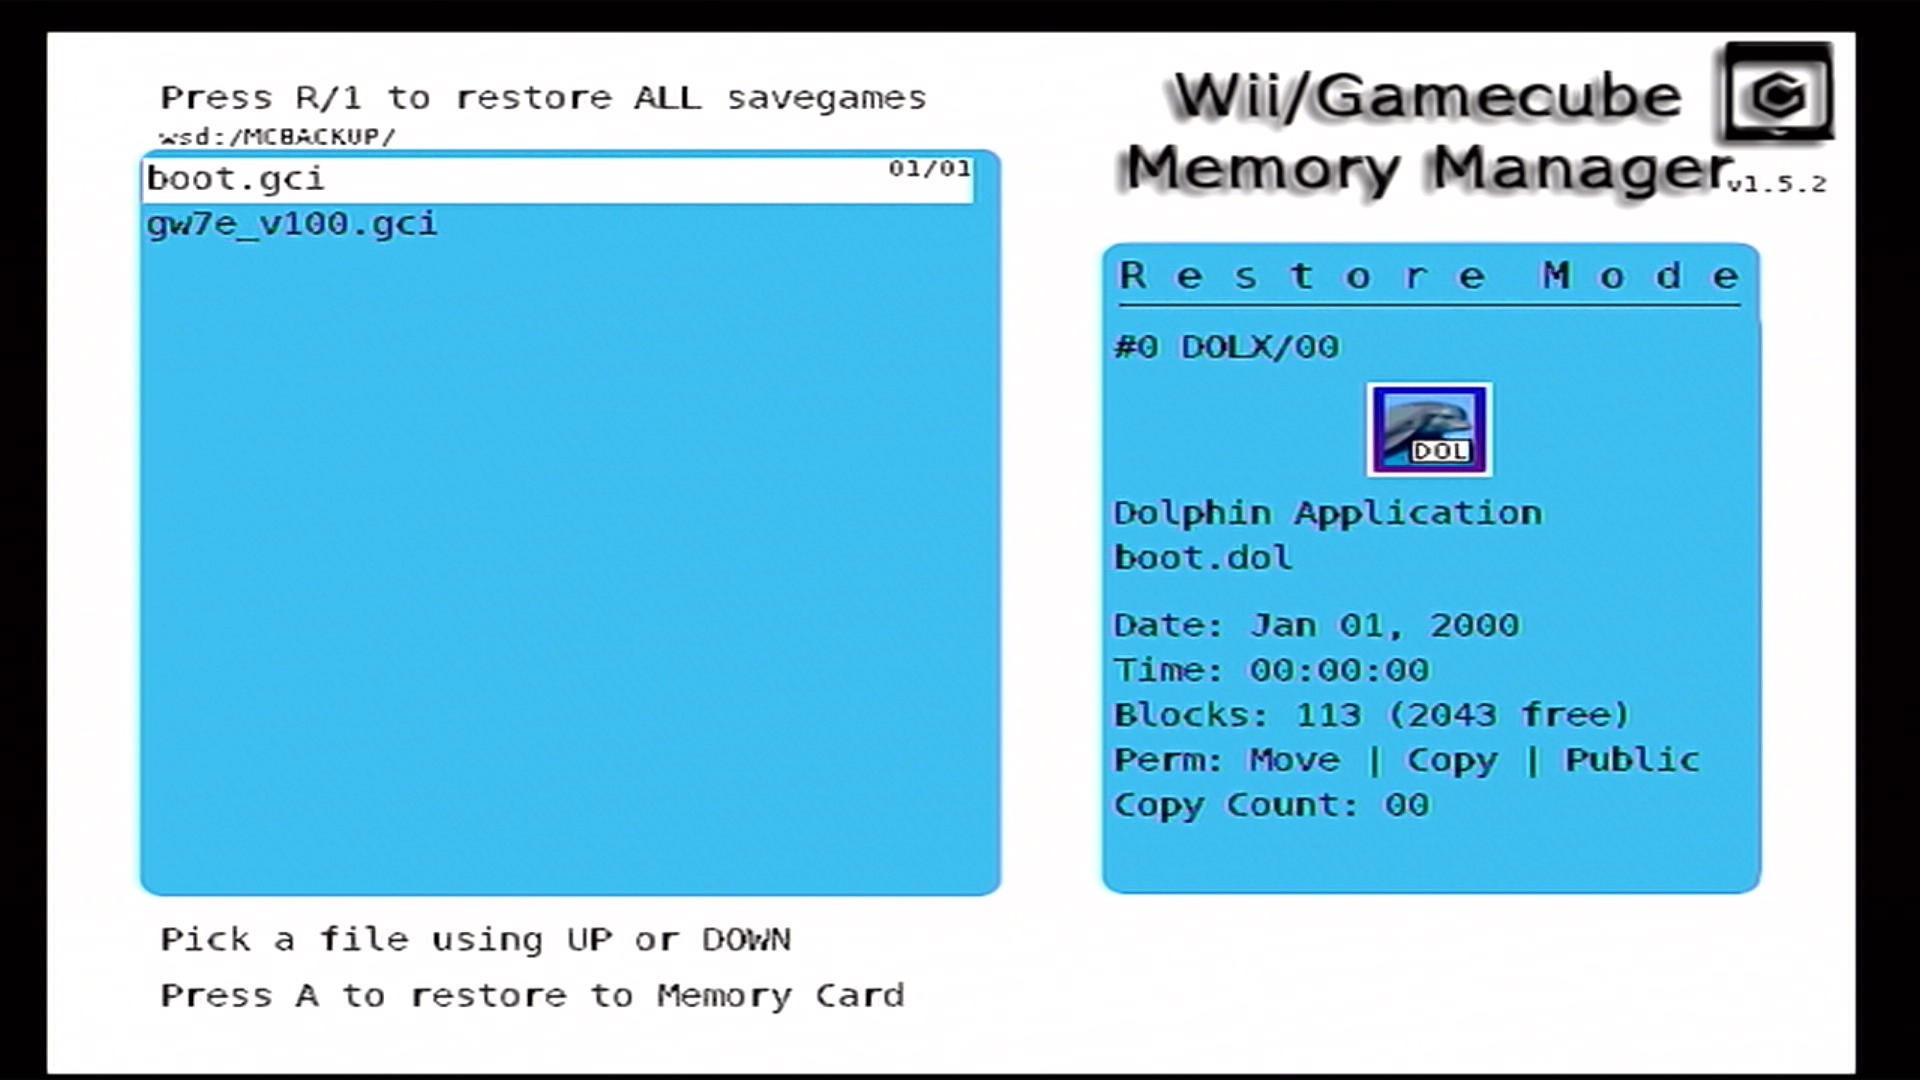
- If you would like to restore all the saves in
- When restoration is complete, press any button to continue.
Instructions
- Open Dolphin Emulator and select
Tools > Memory Card Managerfrom the main menu. - Click the
Openbutton next to Slot B. - Go to the
savesfolder on your SD card or USB drive, and select the.rawfile named after the game’s ID.- If you do not already have a save on Nintendont, select
Createand set the Card size to 251 blocks. - If you are using one memory card for all games, open the
ninmem.raw/ninmemj.rawfile on the root of your SD/USB.
- If you do not already have a save on Nintendont, select
- If Dolphin is storing your saves in a GCI folder (default):
- Click
Switch to B. - Click
Import, and navigate to<REGION>/Card A/. - Select the
.gcifile(s) you would like to import. Otherwise, if Dolphin is storing your saves in a.rawfile. simply select your saves on the left side and selectCopy to B.
- Click
All methods here require a Wii with GameCube ports.
What you need
Instructions
- Download and extract GCMM to the root of your SD card or USB drive.
- Safely eject the SD/USB from your PC, then put it into your Wii.
- Launch the Homebrew Channel, then launch GCMM.
-
Select the device you would like to copy the save file to.
-
Press
Band-/LandYto enter Raw backup mode. -
Select the slot that has your memory card.
- When the dump is complete, press any key to continue.
- Press HOME/START to exit GCMM.
- Insert your SD card/USB drive into your PC.
- Copy the
.rawfile insideMCBACKUPto the root of the device used for Nintendont and name itninmem.raw.- If your games are Japanese, Nintendont will use
ninmemj.raw, because Japanese games do not play very nicely when there are other region saves present.
- If your games are Japanese, Nintendont will use
- Launch Nintendont and set Memcard emulation to multi [ ? ]
What you need
Instructions
- Download and extract GCMM to the root of your SD card or USB drive.
- Safely eject the SD/USB from your PC, then put it into your Wii.
- Launch the Homebrew Channel, then launch GCMM.
-
Select the device you would like to copy the save file to.
-
Press
Band-/LandYto enter Raw backup mode. -
Select the slot that has your memory card.
- When the dump is complete, press any key to continue.
- Press HOME/START to exit GCMM.
- Insert your SD card/USB drive into your PC.
- Open Dolphin Emulator, and select
Tools > Memory Card Managerfrom the main menu. - Click
Opennext to slot B. - Go into the
MCBACKUPfolder on your SD/USB, and open the newly created.rawfile. - Click
Switch to B. - If Dolphin is set to store saves in a GCI folder (default):
- Select the saves you would like to copy.
- Click
Export as .gci. - Export the
.gcifiles to<REGION>/Card A/.
- Otherwise, if Dolphin is set to store saves in a
.rawfile,- Select the saves you would like to copy.
- Click
Copy to A.
What you need
- a Wii
Instructions
- Insert both memory cards into your Wii.
-
Launch the Wii menu and select the Wii Options button at the bottom left.
- Select
Data Management > Save Data > Nintendo GameCube. -
Select the save you would like to copy and select
Copy.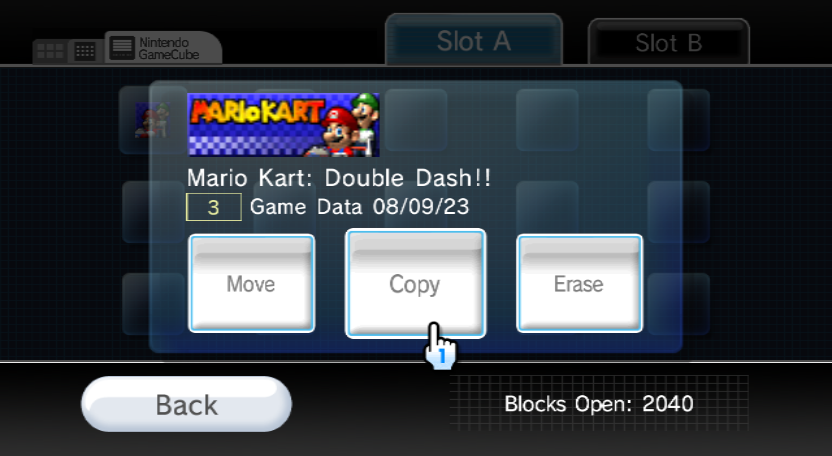
What you need
- Latest beta or Development version of Dolphin Emulator
Instructions
- Insert your SD card or USB drive into your PC.
- Open Dolphin Emulator, and select
Tools > Memory Card Managerfrom the main menu. - Click
Opennext to slot B. - Navigate to the
savesfolder on your SD/USB, and open the.rawfile named after the game ID of your game. - Click
Switch to B. - If Dolphin is set to store saves in a GCI folder (default):
- Select the saves you would like to copy.
- Click
Export as .gci. - Export the
.gcifiles to<REGION>/Card A/.
- Otherwise, if Dolphin is set to store saves in a
.rawfile:- Select the saves you would like to copy.
- Click
Copy to A.
What you need
- The Homebrew Channel installed on your Wii
- An SD card or USB drive
- GCMM
Individual memcards (.gci files)
- Insert your SD card or USB drive into your PC.
- Create a folder named
MCBACKUP. - Copy the
.gcifiles inside thesavesfolder to theMCBACKUPfolder. - Download and extract GCMM to the root of your SD card or USB drive.
- Safely eject the SD/USB from your PC, then insert it into your Wii.
- Launch the Homebrew Channel, then launch GCMM.
-
Select the device you have copied the
.gcifiles to. -
Press
+/Xto enter Restore mode. -
Select the slot that has your Memory card.
- Select the save you would like to restore.
- If you would like to restore all the saves in
MCBACKUP, press1/R.
- If you would like to restore all the saves in
- When restoration is complete, press any button to continue.