Restoring the Wii NAND to Stock
This guide details how to create a stock NAND for your Wii system using a program called Ohneschwanzenegger. Unlike the Format Wii System Memory option in the Wii settings, this will completely wipe any changes to the NAND by downloading a stock Wii System Menu from NUS servers. If followed correctly, the Wii should have no homebrew left on the system, stock IOSes, and boot up to a factory setup screen when the NAND is flashed.
Please note that this program needs an existing (even bricked!) NAND backup to function, as it needs to have a copy of the first 8 blocks of NAND, a bad blocks list, and AES/HMAC keys.
The instructions detailed in this guide WILL ERASE YOUR WII SYSTEM MEMORY and should only be considered as a LAST RESORT or if you are trying to do any of the following:
- Restore the Wii to a state comparable to when it left the factory.
- Fix a brick where you do not have a functional NAND backup or access to the Homebrew Channel but can still make one using BootMii.
- You are unable to revert certain changes to the Wii System Memory such as all cIOS with DARKCORP.
If you are trying to update your Wii to 4.3U with homebrew or update outdated homebrew/IOS, you most likely do not need to follow this guide. Instead, you can use a tool like the SysCheck Updater Wizard built into ModMii. If you are confused about this process, consider joining the Nintendo Homebrew discord server for support.
Requisiti
- Una scheda SD con un spazio disponibile minimo di 512MB (1GB o più sono consigliati)
- A NAND backup from the specific system you are trying to flash
- A Windows computer with an Internet connection
- Ohneschwanzenegger
- Nand BIN Checker
Istruzioni
Section I - Preparation
-
Start Ohneschwanzenegger. You may get a Windows SmartScreen prompt, this is a false positive and you can run the program anyway by pressing
More infoandRun anyway. -
Press the
Local Cachebutton, create a new folder for the NUS cache to be output in, and then press OK. An example folder is given below.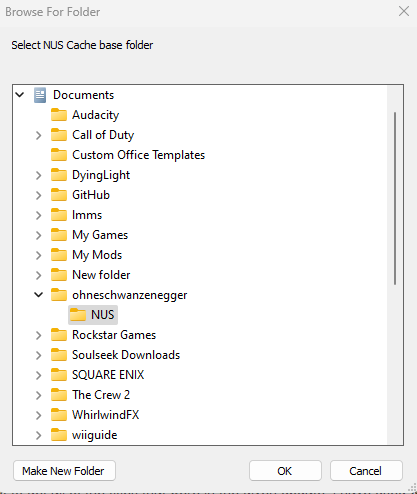
-
Press
Nand Dumpon the toolbar, and then pressNew nand. This should open a pop-up window where you can adjust parameters for a new NAND dump. Press the largeExisting Nand...button and find your existing NAND dump from your Wii.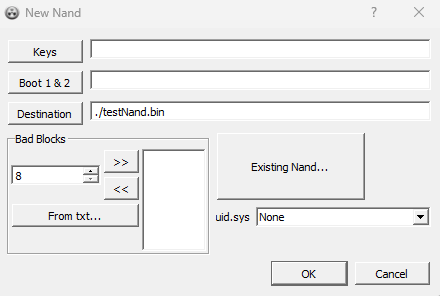
-
This will fill in information such as the keys, Boot 1/2, and your bad blocks automatically. ONLY change the Destination box to
./blankNand.bin, which will output the NAND to the program folder with the nameblankNand.bin. Then, press OK.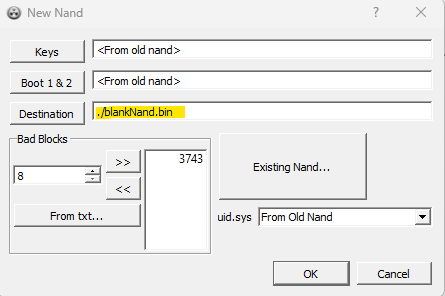
Section II - Creating a Blank NAND
-
Now that the NAND is loaded into the program, select
Contenton the toolbar and then press Format. This will initialize your BLANK NAND, not your backup NAND.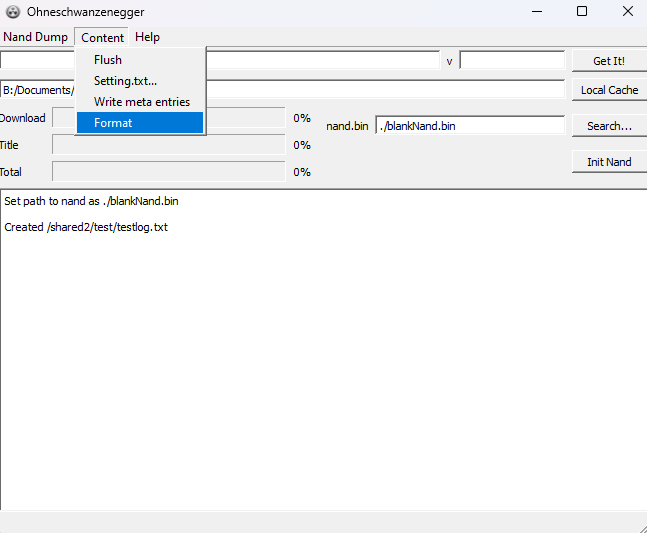
-
Select the top left text box in the program and type in the Wii System Menu version that you need the NAND to have. Note that this should optimally be the version that your NAND was previously using. This NAND was using
4.3U. Other valid examples are3.2U,4.3E, or3.4J.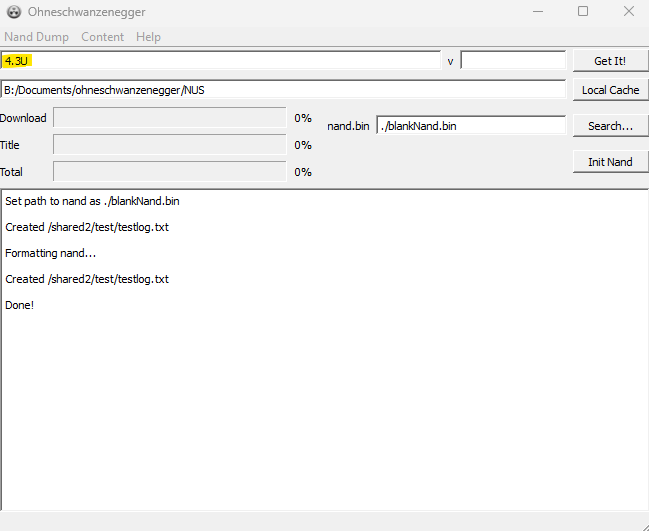
-
Once you have confirmed you have entered the version of the menu that you want, press enter or
Get It!. This will begin downloading the menu from NUS servers, with the progress displayed in the program.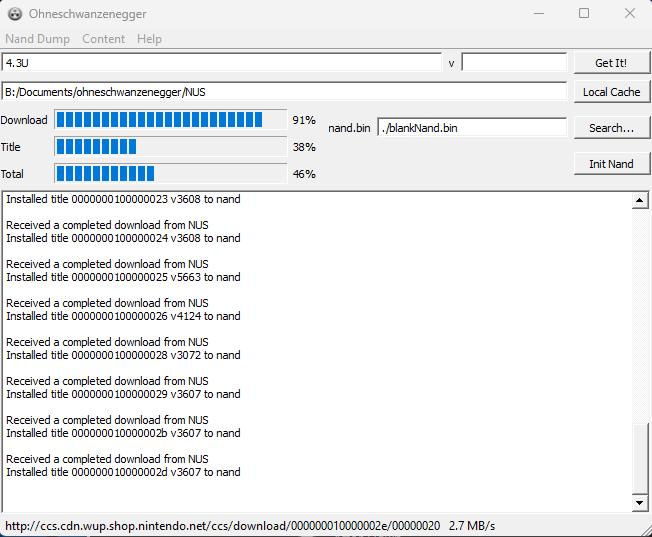
-
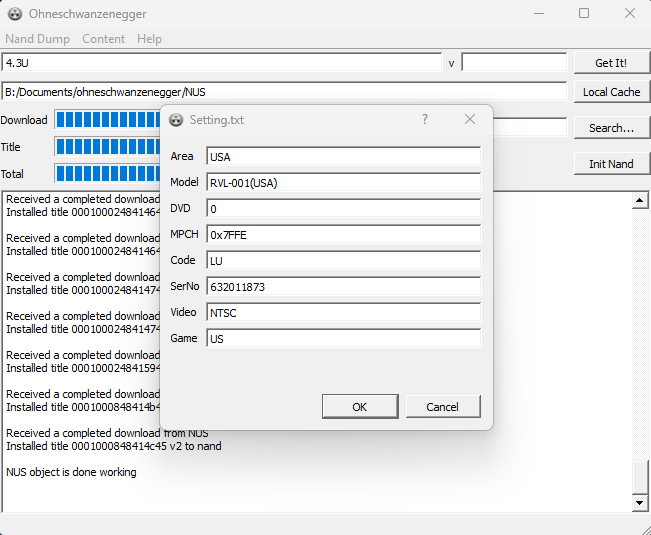
Once the menu has finished downloading, a pop-up will display showing the settings appended to the NAND. It will be autofilled depending on what was in your NAND, although the serial number may be incorrect. You can edit this if you would like, otherwise keep everything blank and press OK.
-
Next, press
Contenton the taskbar and pressWrite meta entries. Then, go back to the menu and pressFlush. You may then close the window.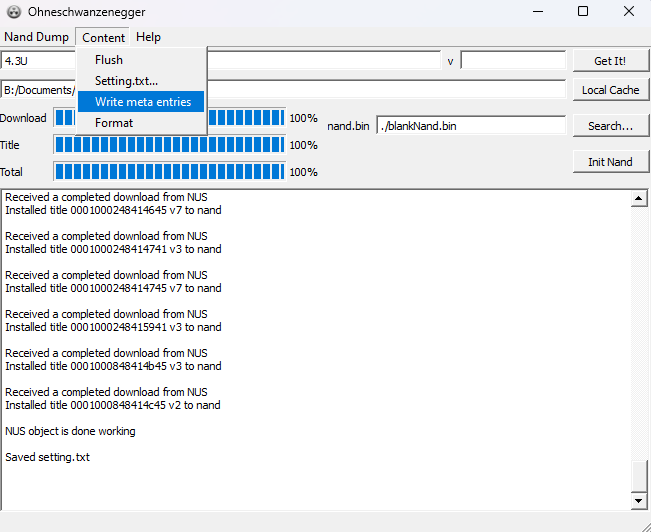
Section III - Verifying the NAND
-
If NAND Bin Checker is not already in the same directory as Ohneschwanzenegger, copy it there now. Then, open a terminal in that directory. Run the following command:
.\nandBinCheck.exe .\blankNand.bin. If you named the NAND something else, adjust the command accordingly. The program will then check the validity of the NAND.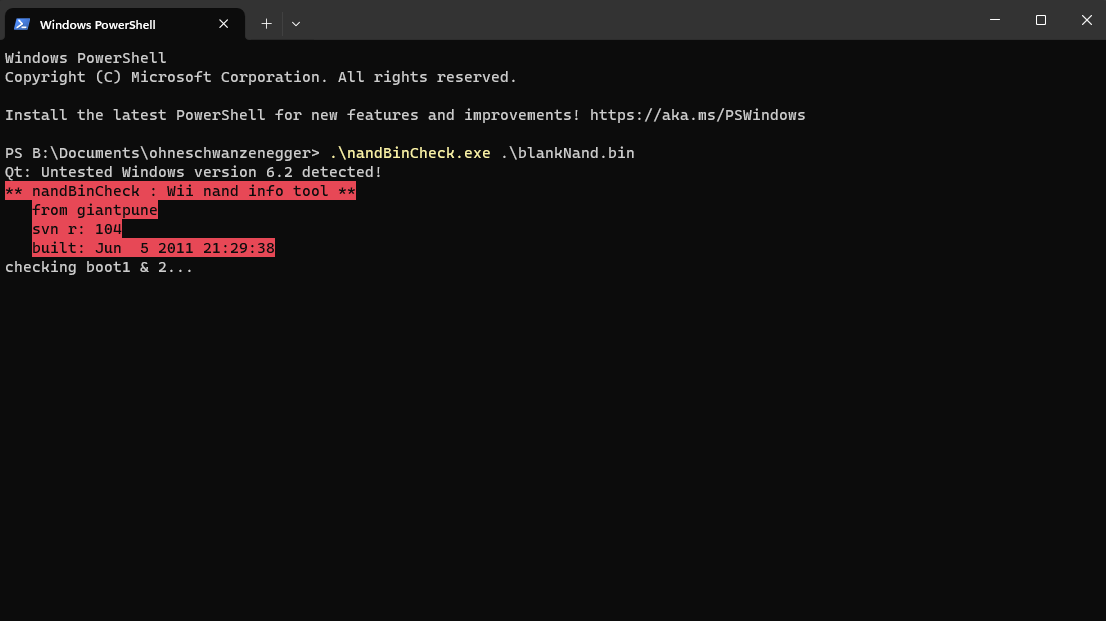
-
If all is well, the result should look similar to the below. If there are ANY errors that stand out, DO NOT use this NAND and try again as it may damage or permanantly brick your Wii. If you continue to get these errors on further attempts, go to the Nintendo Homebrew discord server for support.

-
Move the
blankNand.binto your Wii SD card and rename it tonand.binso that it can be flashed by BootMii. Remember not to overwrite your existing NAND!
Continue to BootMii Recovery Now that you have a blank NAND, you can restore it on your Wii using BootMii.