BootMii Recovery
This guide will provide instructions on how to restore a backup of your NAND with BootMii. Please bear in mind that this is usually the last resort method of repairing a brick if you have one, and if it does not fix your issue, you may have to seek support. If you are still able to enter BootMii, make an attempt to enter the Homebrew Channel instead so that you may attempt to identify and repair the brick using other methods.
If you have BootMii installed as boot2, you will need to launch BootMii by restarting the console. Skip steps 1 and 2 if this is the case.
If the screen stays black and the blue disc drive light is blinking upon launching BootMii, you are missing the BootMii files on your SD card. Download this zip file and extract it to the root of your SD card, then try again.
Family edition Wiis (Wiis without GameCube ports) CANNOT restore NAND backups. This is because of the lack of GameCube ports which are required on non-boot2 Wiis to enter the restoration confirmation code. For additional help, please seek support.
DO NOT restore an unverified NAND backup, or one that is not from your Wii: this may lead to a WORSE BRICK. The same goes for using faulty SD cards.
Requirements
- An earlier NAND Backup made by BootMii
Restoring individual data from a NAND backup
There is likely a much safer and faster way to bring individual data back to your Wii, likely involving the use of Dolphin Emulator.
For example, if you want to restore your Wii Message Board data, use Dolphin to import your NAND backup. In Dolphin, go to File -> Open User Folder, and find Wii/title/00000001/00000002/data/cdb.vff, copy it to your SD card, and use WiiXplorer to restore it in the corresponding location.
If you want to restore a game’s save data, use Dolphin to import your NAND backup, use Tools > Export All Wii Saves to export all your saves to your SD card, and use Data Management to move it to your Wii.
Important preliminary notes
-
If you have not done anything to cause a brick (or you’re starting up your Wii after a long time), then it is probably a Wi-Fi Brick.
-
If you have BootMii as IOS installed, RestoreMii will prompt you for the Konami code via a GameCube Controller.
-
You must use the POWER (right) and RESET (select) buttons on your console, or a GameCube controller plugged into port 1 to navigate BootMii. To navigate with a GameCube controller, click left/right on the +Control Pad on a GameCube controller. To select, press A.
Instructions
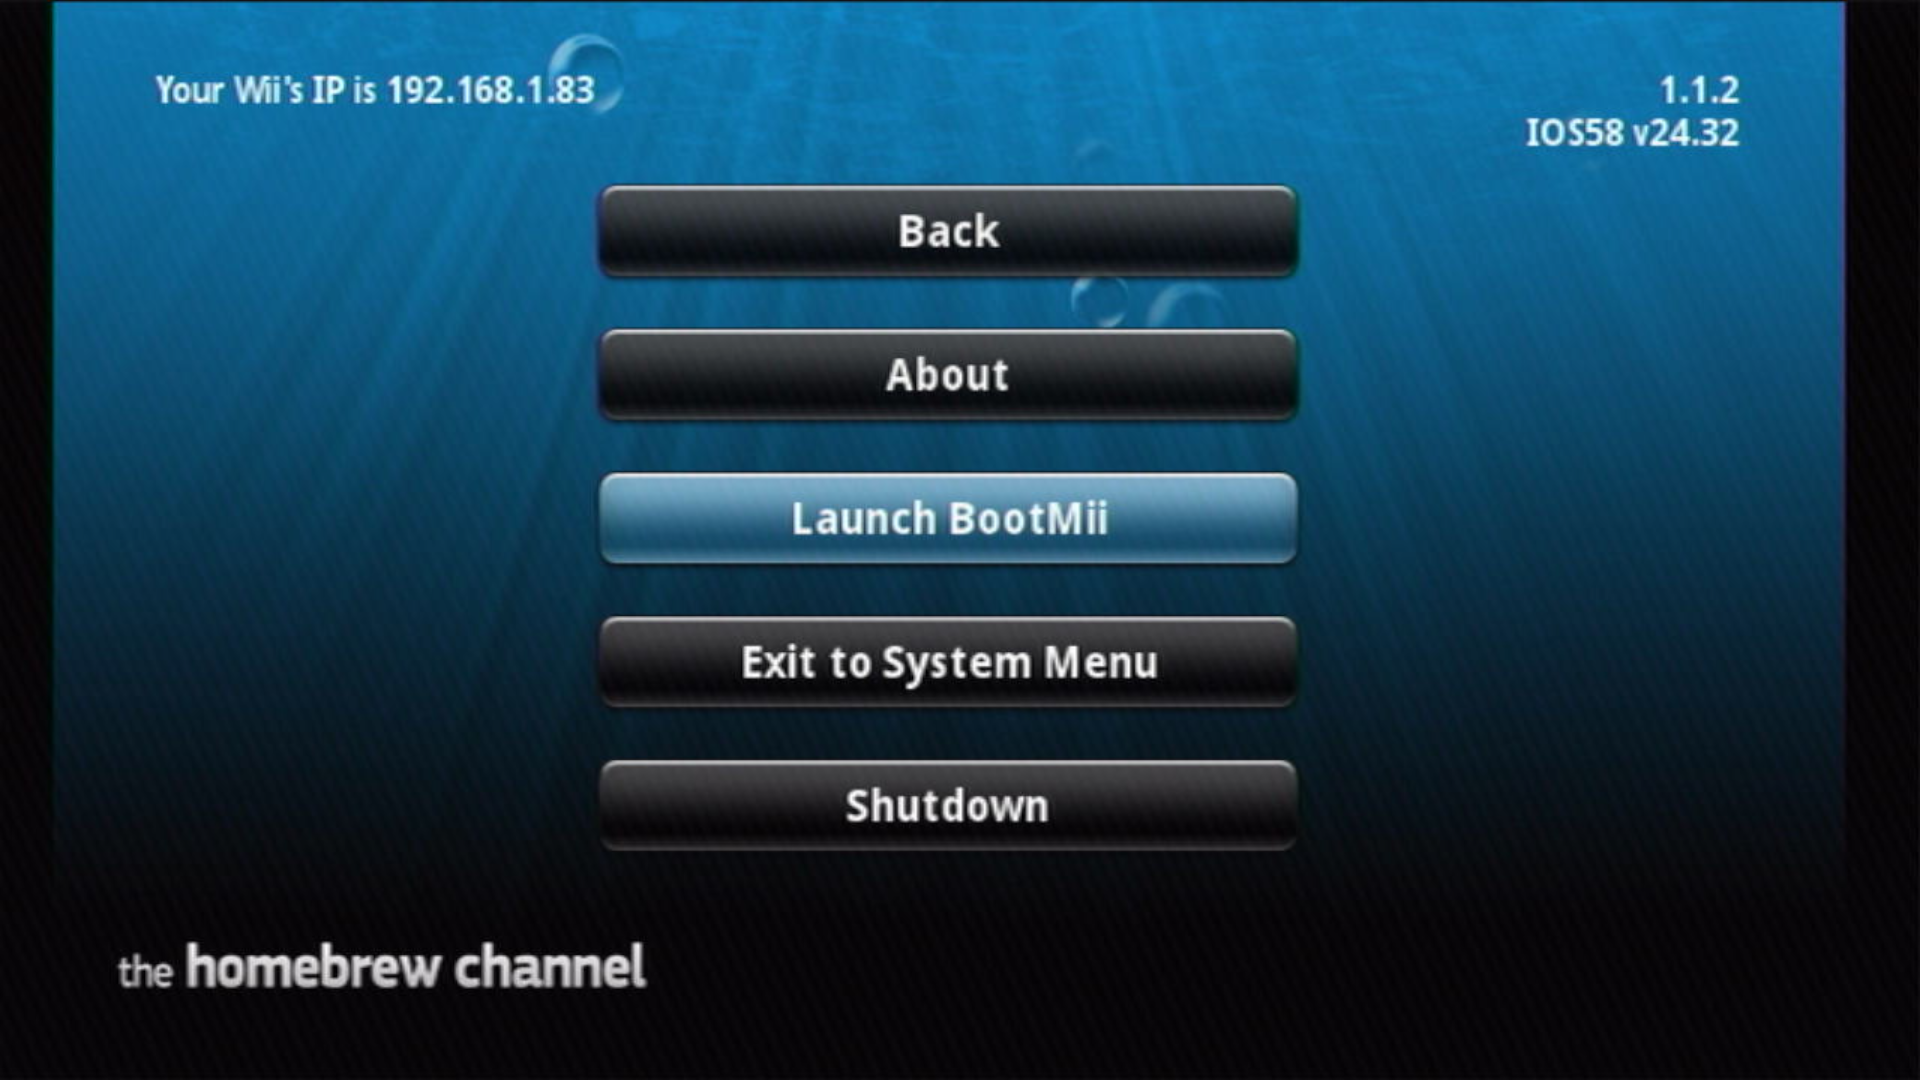
- Launch the Homebrew Channel.
- Press the HOME Button, then select “Launch BootMii”.
- If the Homebrew Channel is inaccessible and you have Priiloader installed, you may also access it on boot and select
BootMii IOSto load BootMii.
- If the Homebrew Channel is inaccessible and you have Priiloader installed, you may also access it on boot and select
-
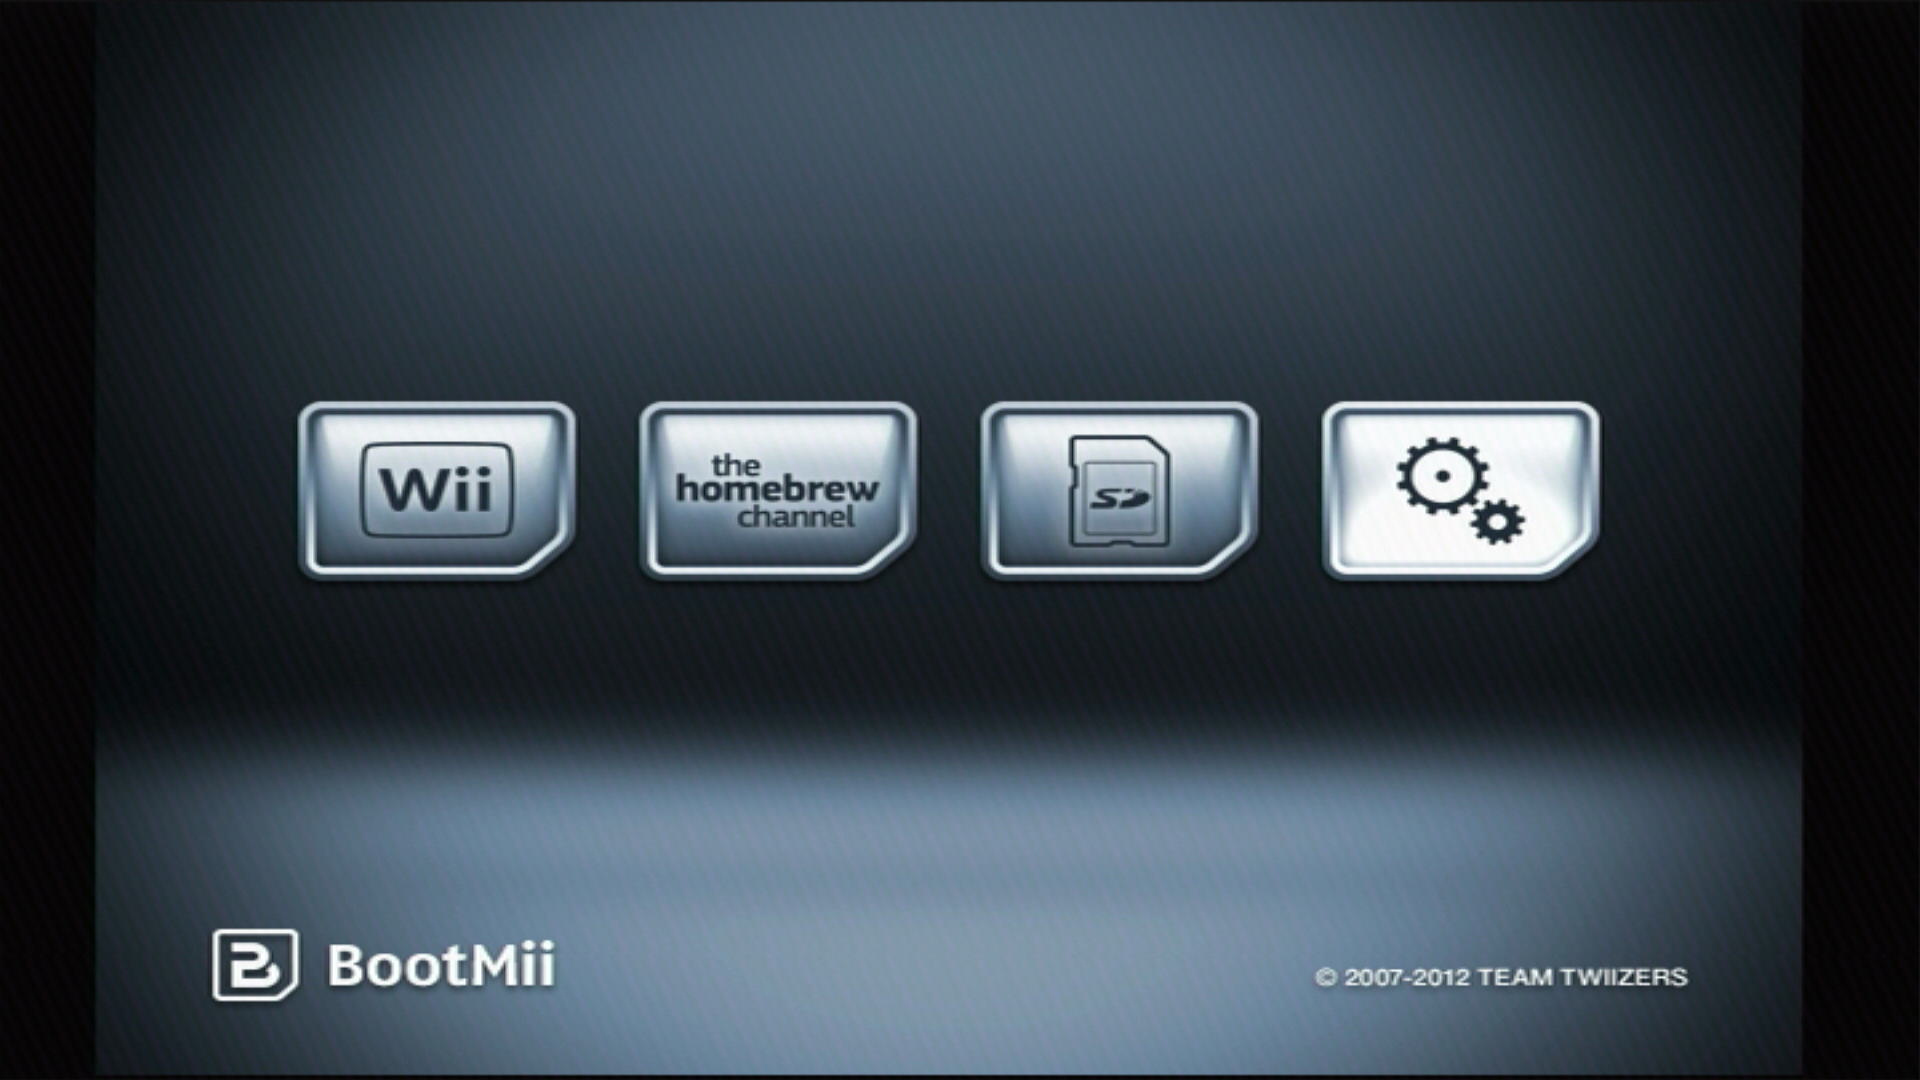
Select the Options button (the icon with the gears).
-
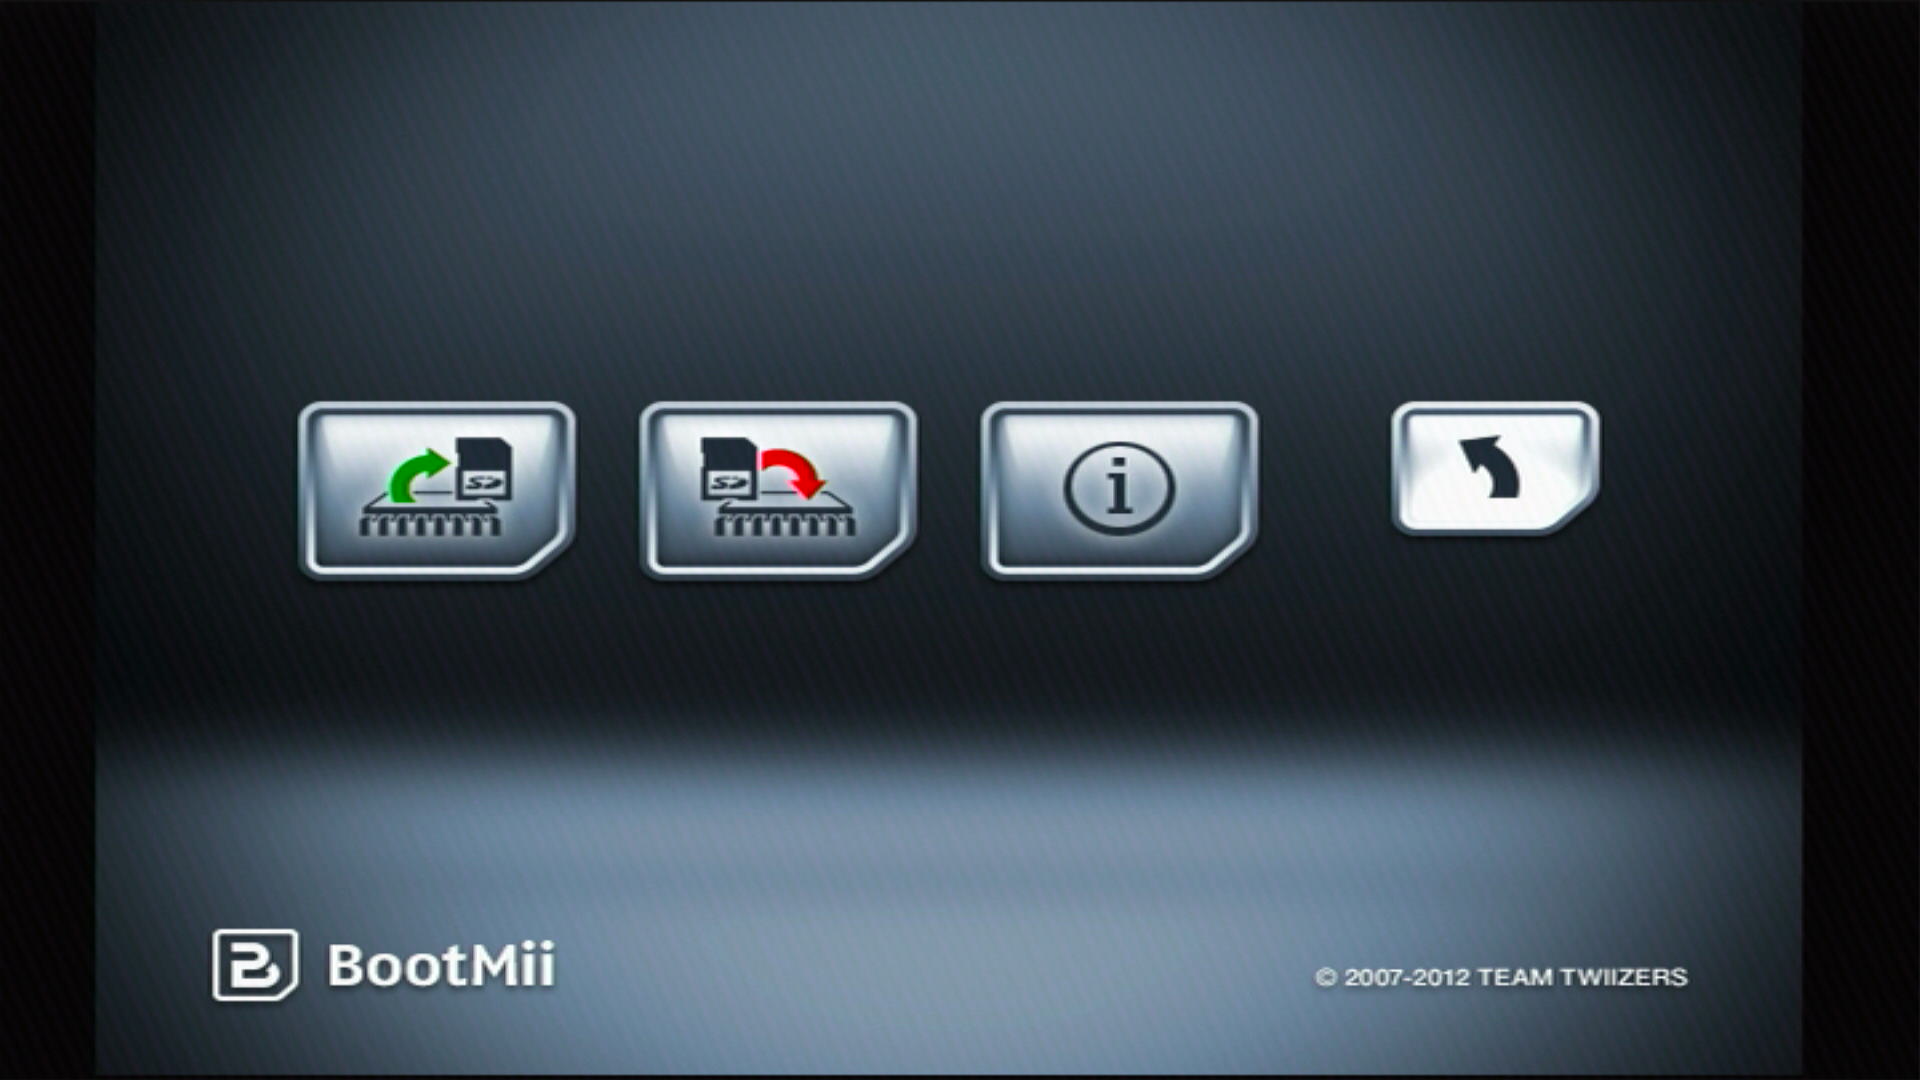
Select the RestoreMii button.

-
BootMii will inform you that it will run in SIMULATION mode, you can press A or Reset to continue.

-
If BootMii is installed as IOS, input the Konami code on your GameCube controller: ↑, ↑, ↓, ↓, ←, →, ←, →, B, A, START

-
BootMii will run through the restore process as a simulation, detailing what will be erased and rewritten. Once this is done, you have one final chance to back out of the restoration process. Otherwise, press START or the Eject button to begin.

-
After the recovery ended, you should see a text say
I HAZ SUCCESS!, otherwiseI HAZ FAIL. Hit any button on your Wii console or GCN controller.
-
Press the Back button (the one with an arrow), then press either the Wii Menu button or the Homebrew Channel button to exit BootMii.
If you were restoring a NAND backup in order to repair a brick and this did not fix your issue, please consult the bricks portion of this guide.